
Creating an account and container
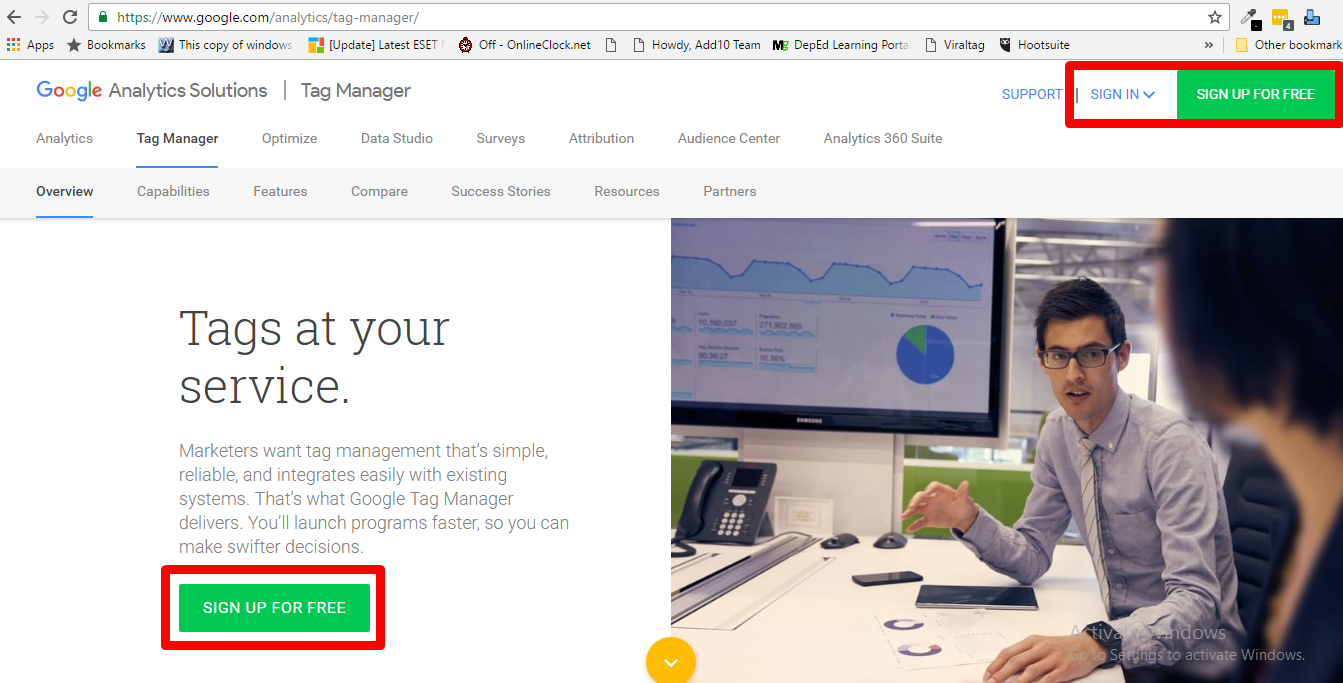
1. Go to Google Tag Manager and sign up for free if you haven't yet.
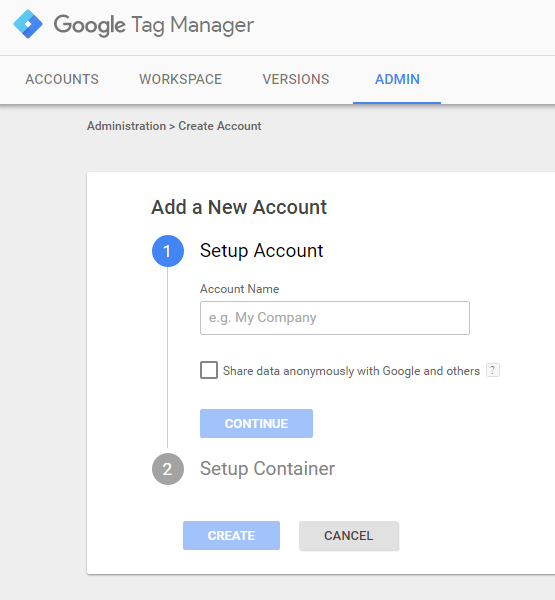
2. Create a new account. Enter an account name, optionally select the checkboxes to enable sharing data anonymously with Google and others and click Continue.
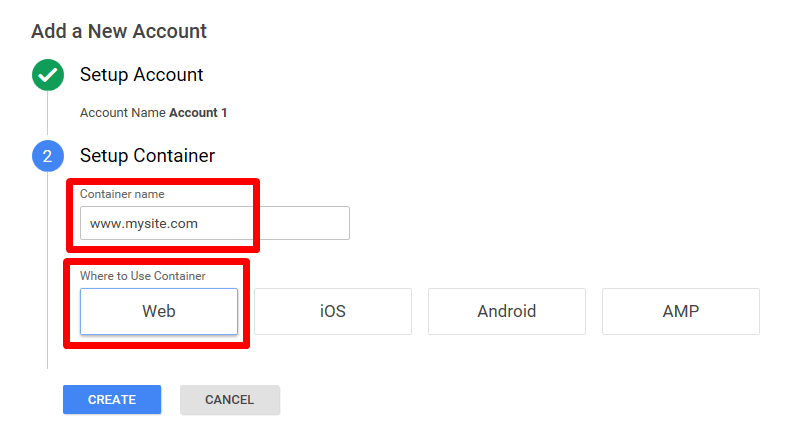
3. Enter a container name when prompted in the Setup Container dialog. Select the container for Web, AMP, iOS, or Android.
Let's do one for Web. Click Create.
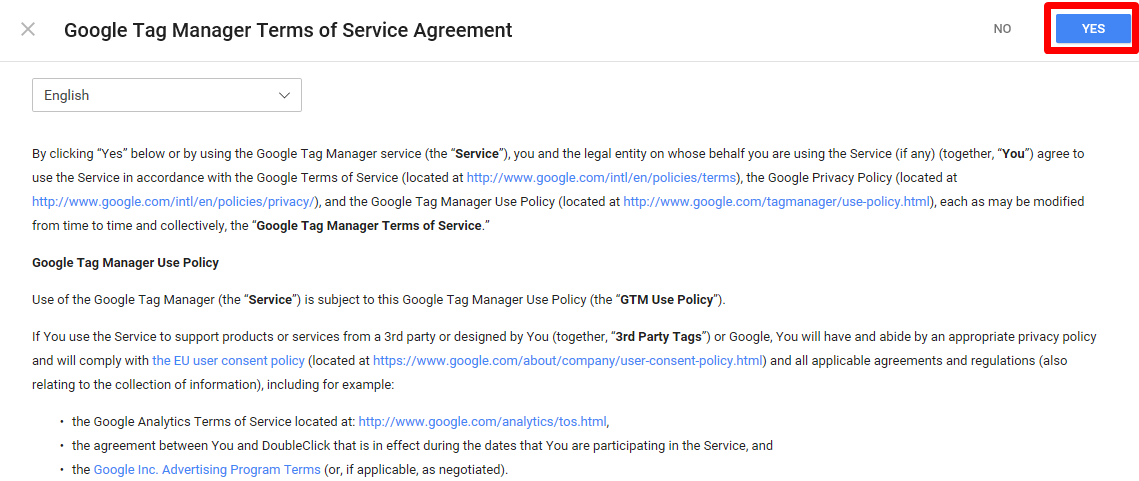
4. Review the Terms of Service and click Yes if you agree to those terms.
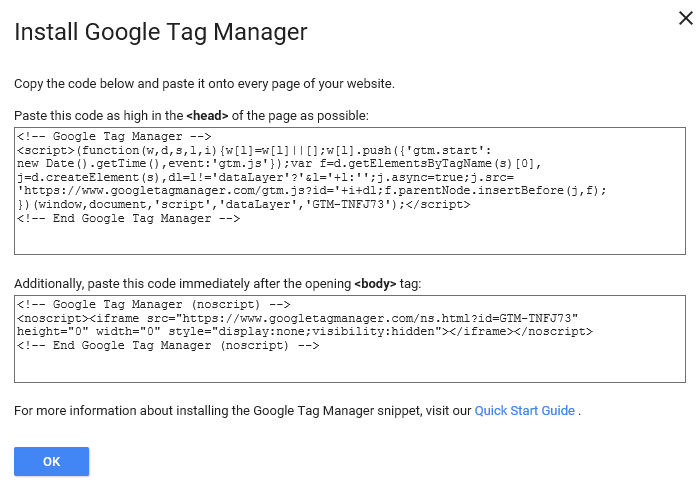
5. When your new container first loads, you will be prompted with the web container installation code snippet.
Click OK to clear this dialog (you can always set up your container first and install the container snippet or SDK later.)
Installing Google Tag Manager Plugin to WordPress
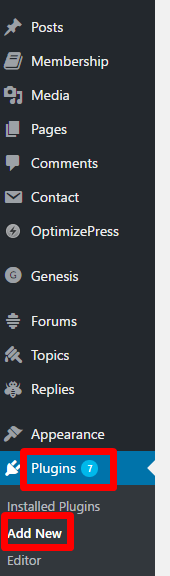
1. Log in to the back end of your WordPress site and scroll down to Plugins and click on Add New.
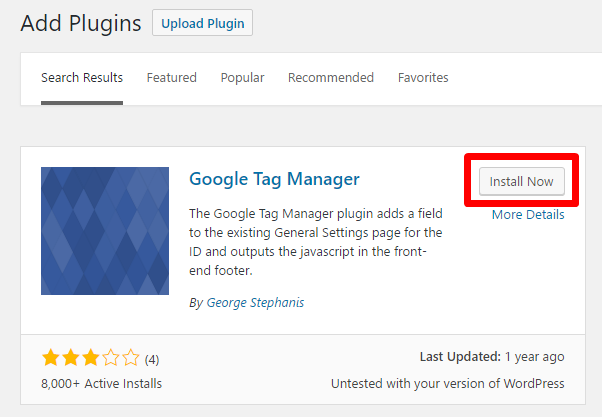
2. Enter Google Tag Manager in the search box.

3. Install Google Tag Manager plugin then activate.
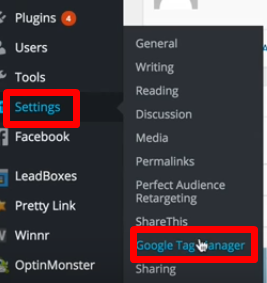
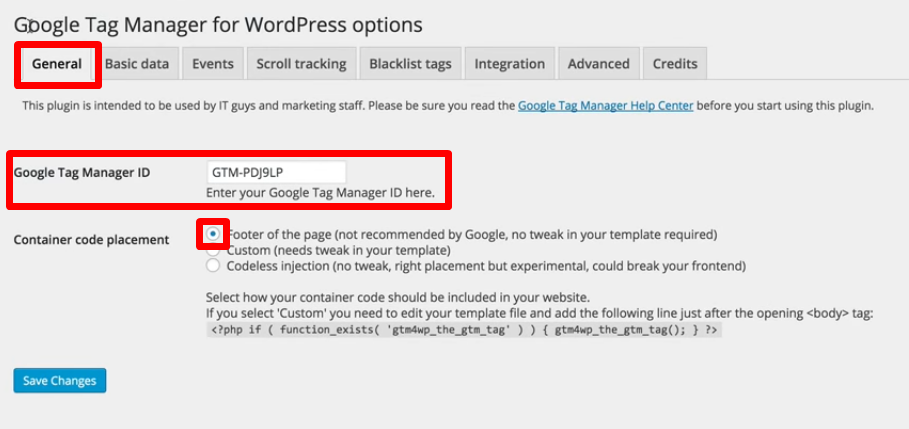
4. Once activated, go to Settings and look for Google Tag Manager in the list and click.
5. Enter your Google Manager Tag ID. Choose Footer as the container code placement. Save changes.
NOTE: Your Google Tag Manager ID can be found near the top of your Google Tag Manager workspace's home screen where you will see your container ID number formatted as "GTM-XXXXX".
